
| “ | Final Fantasy X & Mobius FF
Time to practice smiling! |
„ |
| ~ In-game description |
Dream Within a Dream, Part 4 or Episode 4, is the penultimate story chapter for the Final Fantasy X Collaboration Event. It features Tidus and Yuna from Final Fantasy X returning to Macalania Forest (or Palamecia's equivalent) to help Tidus regain his confidence.
Event Details[]
- First appearance: October 1 - November 30, 2018
- Second appearance: January 22 -
April 1, 2020end of service, June 2020 - Event type: Collaboration story region.
How to Participate[]
- Select "FFX Episode 4: Macalania Forest" from the world map -- branched off of the Chapter 1: Blank Slate node.
- You must complete Dream Within a Dream, Part 3 before this region becomes available.
Story[]
Continued from Dream Within a Dream, Part 3

Yuna and Tidus have arrived at Macalania Forest, accompanied by Wol and Echo. Palamecia has declared Tidus and Yuna to be heretics, ending their quest to be Warriors of Light. Tidus is despondent, so Yuna has brought the gang here, where important memories for the two of them were first made. Yuna reminds Tidus that this isn't the first time they faced no hope and no direction... and they got through it. Here.
It's not just Palamecia out to get them, though. Yojimbo has followed them here, and attacks. But surprisingly, his target seems to be Yuna alone! The mercenary is beaten back, but we have a new mystery on our hands.
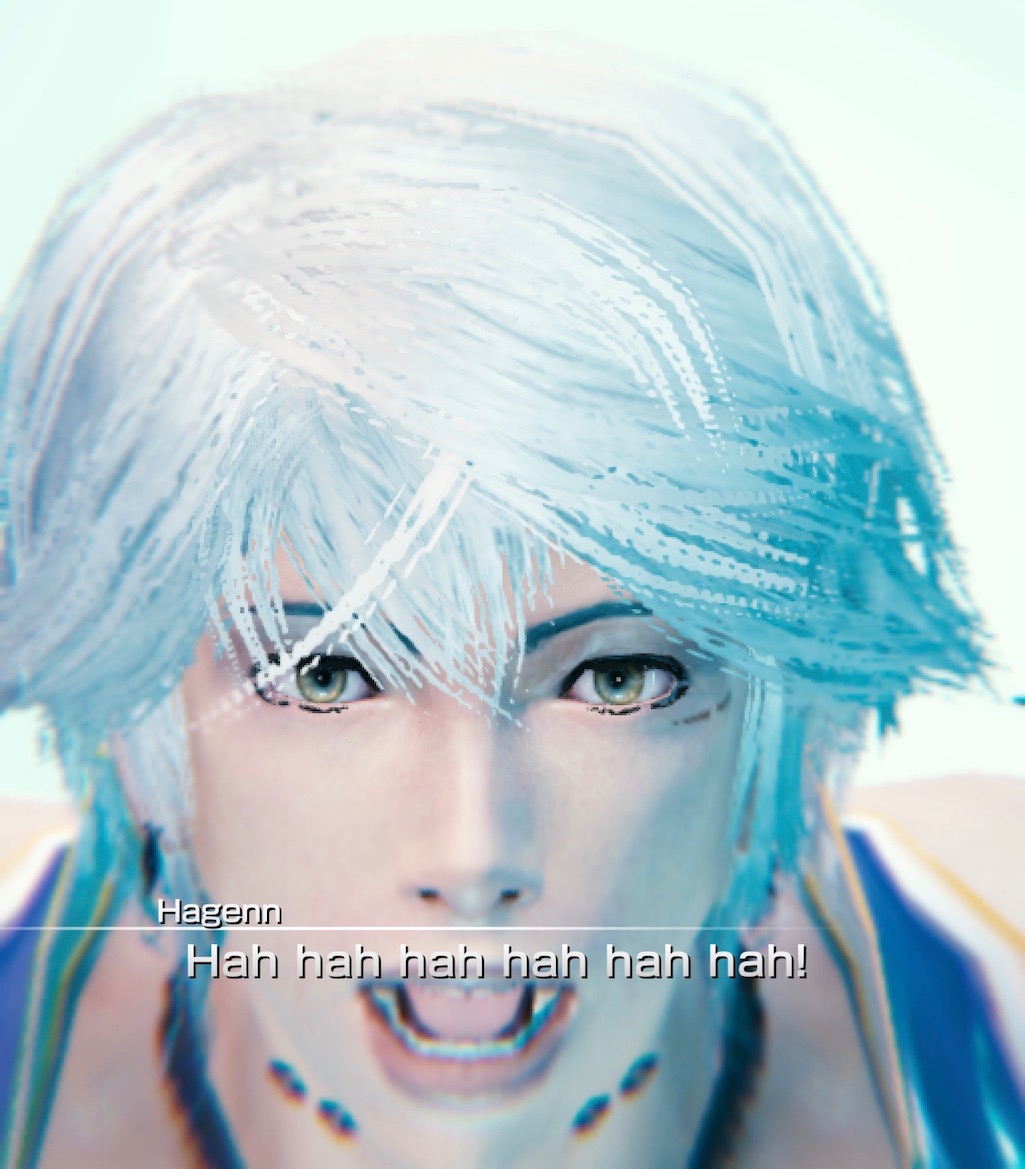
A stint of Butterfly Chasing gives the group some respite, and reminds Tidus that the two of them need to practice laughing. It's a weird sight to Wol and Echo, but it does seem to lighten Tidus' mood... at least publicly. Echo wonders if it's something Wol should try, and Wol rises to the challenge. The result is... terrifying.
Progressing down the path, they run into a wall of ice. Shiva has come calling. With his usual regularity, Wol goes through Shiva's trials, and obtains her as his third Aeon. But it's all leaving Tidus cold. He goes on ahead, without the others, to clear his head.
The group catches up with Tidus at the center Holy Spring, still contemplating his existence. He seemed to have a grand new story ahead of him, with Yuna at his side this time. But Palamecia has branded them as heretics, ending that story. So now what? Yuna tells Tidus that they could stop trying so hard, until they figure out what's next. Tidus dreams of restarting Blitzball on this world, with a full set of teams... then declares that as much of a fantasy as being the Warrior of Light. He swims off alone.
On shore, Wol points out that such advice doesn't help Tidus. Quite the contrary -- Tidus needs a hard goal. Yuna is puzzled for a second, then understands that the real Yuna would know that, and wouldn't have given such advice.
... wait, what?

Yuna changes into Valefor, then dissolves in a cloud of pyreflies. Looks like Yuna was never really there at all. Wol gathers Tidus and tells him Yuna is gone, but he dashes off before Wol can say anything more. Wol better find Yuna first, then. Too bad she's on the other end of another set of trials.
The trials go smoothly, and Wol catches up to Yuna. It's unclear just what this entity is, but it insists that it's trying to make things better for Tidus. Wol and Echo are unconvinced, but will allow it to stay as long as it confesses the truth to Tidus. Now to go find him... again. Luckily, they hear a sharp whistle from the distance. Tidus is trying to call them! Yuna answers, and they set off locating him.
As they hunt around the woods, Yuna emphasizes that her goal is to make Tidus happy, and hits on an idea: return him to Spira. But that's not possible... is it? She states that since they've been declared Heretics, the Laws of Palamecia want them out. That may be enough of a loophole to escape, somehow. That would be just the thing to keep Tidus together, so the group agrees that they shouldn't breathe a word about Yuna's true nature to Tidus.
They finally catch up with Tidus, and Wol prods Yuna. The two of them can go back to Spira. Her best theory is that Palamecia and the Farplane overlap, out on the farthest edges of Zanarkand. That's enough for Tidus. He may not be able to save Palamecia, but he can protect them, and get the two of them home. Filled with hope, the band sets off back to Zanarkand.
To be continued in Dream Within a Dream - Conclusion.
Gameplay[]
Screen controls[]
Four controls appear as your abilities grow:
![]() Go to the Sphere Grid through this control.
Go to the Sphere Grid through this control.
![]() This shows the list of Spheres you've collected, that have not been activated yet.
This shows the list of Spheres you've collected, that have not been activated yet.
Shows you the effects of everything you currently have activated. Use the icons on the top bar to switch between your character enhancements and the Aeon enhancements, or filter between different enhancement types.
![]() Lists the Aeons you have available, and shows their total attributes.
Lists the Aeons you have available, and shows their total attributes.
Summoning[]
This region continues the Summoning System. The Sub-deck that normally holds your second (backup) job is replaced by one of the Aeons from Final Fantasy X.
- Click on the red Aeons button to see the stats for the Aeons you have, and to select which Aeon will be summoned during battle.
- During battle, the Job Change Recast button at the bottom of the screen is replaced with a Summon. Select and drag across the circle to bring in the Aeon, or to swap back to your normal Job.
- Aeons come with a pre-set selection of abilities -- no equipping your own abilities, and Card Rentals are not available when the Aeon is in play.
- Normally, the Job Change action becomes available after 2-4 rounds, depending on how many Job Change Recast buffs you have. Aeons are always available after the first round of battle has completed, regardless of Recast buffs. As you go to further skirmishes within the same battle, your character will switch back to your main deck, but this can be immediately switched to the Aeon sub-deck (at the expense of 1 action, of course).
- The Aeon auto-ability No Summoning Recast drops this delay to zero -- bring in your Aeon at any time!
- If an Aeon drops to zero health, you will be forcibly returned to your Main Deck, rather than losing the battle. This means that an Aeon can sacrifice itself to take one mega-attack from a powerful enemy per area. You can't use that Aeon again during that battle, but (like you) it returns to full health on the next area, or (if you also get killed) it will revive with your use of a Phoenix Down.
- Aeons will increase their strength depending on your Deck Level, so equipping high-level cards on your main deck will get you strong Aeons.
- Aeons also get their own Aeon Sphere Grid to increase their abilities and offer new Auto-Abilities. Use
 Aeon Growth Spheres and Aeon Key Spheres there.
Event Map[]

| “ | FFX: Dream Within a Dream Episode 4: Macalania Forest Tidus's desire to become a Warrior of Light together with Yuna was stamped out by the laws of Palamecia. The two return to a land dear to their hearts in an attempt to find a new hope to cling to. |
„ |
| ~ World Map description |
As you traverse the region, you'll receive Spheres as a reward, which you can use in the Sphere Grid and Aeon Sphere Grid to enhance stats and add extra Auto-Abilities. The fiends will get stronger to compensate for that, so be prepared for some heavy fighting!
There are 83 areas in total, with 39 treasure chests.
Butterfly Chasing[]
The first half of the map has a Butterfly Chasing section. In here, your objective is to "follow the blue butterflies"... that is, only kill the ![]() water-based fiends. You can damage the
water-based fiends. You can damage the ![]() fire-based fiends, but killing any of them will fail the area and return you to the last teleport point. This gets tricky, since many of the areas will mix strong water-based fiends with weak fire-based fiends. A regimen of single-target abilities will be an absolute necessity, and Summoning Ifrit may help.
fire-based fiends, but killing any of them will fail the area and return you to the last teleport point. This gets tricky, since many of the areas will mix strong water-based fiends with weak fire-based fiends. A regimen of single-target abilities will be an absolute necessity, and Summoning Ifrit may help.
A few areas will contain a skirmish that consists entirely of fire-based fiends. These are not winnable, and indicate a wrong way. Find a different path.
Areas[]
| Area | Stamina | Battles | Lock requirements | Description | Reward |
|---|---|---|---|---|---|
| Macalania Forest | 2 | 1 | (starting point) | - | |
| Forest Outskirts | 3 | 2 | - | ||
| Crystalline Path | 4 | 3 | - | - | |
| Base of the Elder Tree | 4 | 3 | - | ||
| Shadow of the Pursuer | 5 | 4 | - | Lv.8 | |
| Crystalline Guidepost | 3 | 2 | - | - | |
| Lonesome Shade | 4 | 3 | - | ||
| Meandering Rings | 4 | 3 | - | - | |
| Warbling Branch | 4 | 3 | - | ||
| Butterfly Glade: Entrance | 5 | 4 | - | ||
| Path of Blue (1) | 3 | 3 | - | Defeat fiends drawn to the blue butterflies to find the way! |
- |
| Path of Red | 3 | 3 | - | Follow the path set out by the blue butterflies! |
- |
| Path of Blue (2) | 3 | 3 | - | Defeat fiends drawn to the blue butterflies to find the way! |
- |
| Cluster of Butterflies (lower) | 3 | 3 | - | Change |
- |
| Path of Blue (3) | 3 | 3 | - | Defeat fiends drawn to the blue butterflies to find the way! |
- |
| Cluster of Butterflies (end) | 3 | 3 | - | Your destination is sealed off by fiends summoned by the red butterflies. |
- |
| Path of Red | 3 | 3 | - | Follow the path set out by the blue butterflies! |
- |
| Cluster of Butterflies | 3 | 3 | - | Your destination is sealed off by fiends summoned by the red butterflies. |
- |
| Butterflies' Rest | 3 (5) | 3 (4) | - | Your destination is sealed off by fiends summoned by the red butterflies. |
- |
| Path of Blue (4) | 3 | 3 | - | Defeat fiends drawn to the blue butterflies to find the way! |
- |
| Cluster of Butterflies (center) | 3 | 3 | - | Your destination is sealed off by fiends summoned by the red butterflies. |
- |
| Cluster of Butterflies (left) | 3 | 3 | - | Change |
- |
| Cluster of Butterflies | 3 | 3 | - | Defeat fiends drawn to the blue butterflies to find the way! |
- |
| Heart of Delusion | 3 | 3 | - | Defeat fiends drawn to the blue butterflies to find the way! |
- |
| Frosty Forked Road | 4 | 4 | - | Your destination is sealed off by fiends summoned by the red butterflies. Defeat |
- |
| Shiva's Altar | 5 | 4 (3) | - | Prove your mastery of the art of summoning! |
|
| Shiva's Trial 1 | 4 | 4 (3) | - | Use the power of summoning to overcome your trial! Start by defeating 7 or more enemies with Shiva! |
|
| Shiva's Trial 2 | 4 | 4 (3) | Use Shiva to defeat 7 or more enemies. | Use the power of summoning to overcome your trial! Defeat 5 or more enemies with Shiva's Heavenly Strike! |
|
| Shiva's Trial 3 | 4 | 4 (3) | Use Shiva's Heavenly Strike to defeat 5 or more enemies! | Use the power of summoning to overcome your trial! Defeat 9 or more enemies with Shiva's Whiteout! |
|
| Shiva's Final Trial | 4 | 4 (3) | Use Shiva's Whiteout to defeat 9 or more enemies! | Use the power of summoning to overcome your trial! With Shiva by your side, conquer your last trial! |
|
| Lakeside Path | 4 | 3 | |||
| Radiant Lantern | 4 | 3 | - | - | |
| Spring | 4 | 3 | - | ||
| Edge of Silence | 5 | 4 | - | - | |
| Moonlit Lake | 5 | 4 | - | - | |
| Fallen Star | 6 | 5 | - | ||
| Brimming Tears | 4 | 3 | - | Lv.8 Lv.3 | |
| Flicker of Doubt: Fire | 4 | 4 (3) | - | Use the power of summoning to overcome your trial! Summon Ifrit to defeat the boss, |
|
| Flicker of Doubt: Light | 4 | 4 (3) | Summon Ifrit to defeat the Blizzard Dragon! | Use the power of summoning to overcome your trial! Summon Valefor to defeat the boss, |
|
| Flicker of Doubt: Ice | 4 | 4 (3) | Summon Valefor to defeat the Cyclops! | Use the power of summoning to overcome your trial! Summon Shiva to defeat the boss, |
|
| Precipice of Doubt | 5 | 5 (4) | Summon Shiva to defeat Dahaka! | Yuna's unease draws the attention of a dark Aeon. |
|
| False Summoner | 6 | 6 (5) | Defeat the attacking fiends! | Yuna awaits within the swarm of pyreflies. Lend an ear to what she has to say. |
Lv.8 |
Follow the Whistle[]

As you traverse this section, you will be working to get closer to Tidus' whistling. Choose those areas where the whistling is stronger to reach the completion. If the area you choose is farther away, it will be a dead end.
Tip: Clear areas in the following order: 0 ->2 ->4 ->5 ->6 ->7 ->10 ->13 ->14 ->15 ->19 ->21.
| Area | Stamina | Battles | Description | Reward |
|---|---|---|---|---|
| Ancient Tree | 6 | 5 | - | |
| Roiling Skies | 6 | 5 | ||
| 3 | 2 | The sound of whistling can be heard strongly from somewhere deep within the forest. Clear a path through the fiends to find your way to the source of the sound. |
||
| 3 | 2 | The faint sound of whistling can be heard from somewhere deep within the forest. Clear a path through the fiends to find your way to the source of the sound. |
- | |
| 3 | 2 | The sound of whistling can be heard strongly from somewhere deep within the forest. Clear a path through the fiends to find your way to the source of the sound. |
- | |
| 3 | 2 | The sound of whistling can be heard strongly from somewhere deep within the forest. Clear a path through the fiends to find your way to the source of the sound. |
- | |
| 4 | 4 | |||
| 3 | 2 | The sound of whistling can be heard strongly from somewhere deep within the forest. Clear a path through the fiends to find your way to the source of the sound. |
- | |
| 3 | 2 | The faint sound of whistling can be heard from somewhere deep within the forest. Clear a path through the fiends to find your way to the source of the sound. |
- | |
| 3 | 2 | - | ||
| 3 | 2 | The sound of whistling can be heard strongly from somewhere deep within the forest. Clear a path through the fiends to find your way to the source of the sound. |
- | |
| 4 | 4 | |||
| 3 | 2 | The sound of whistling can be heard strongly from somewhere deep within the forest. Clear a path through the fiends to find your way to the source of the sound. |
- | |
| 3 | 2 | The faint sound of whistling can be heard from somewhere deep within the forest. Clear a path through the fiends to find your way to the source of the sound. |
- | |
| 3 | 2 | - | ||
| 3 | 2 | - | ||
| 3 | 2 | The sound of whistling can be heard strongly from somewhere deep within the forest. Clear a path through the fiends to find your way to the source of the sound. |
- | |
| 3 | 2 | The faint sound of whistling can be heard from somewhere deep within the forest. Clear a path through the fiends to find your way to the source of the sound. |
- | |
| 4 | 4 | The sound of whistling can be heard strongly from somewhere deep within the forest. Clear a path through the fiends to find your way to the source of the sound. |
- | |
| Wandering Woods: Depths 1 | 5 | 4 | ||
| Wandering Woods: Depths 2 | 5 | 4 | ||
| Wandering Woods: Depths 3 | 5 | 4 | ||
| 5 | 5 (4) | Lv.3 |
Post-completion[]
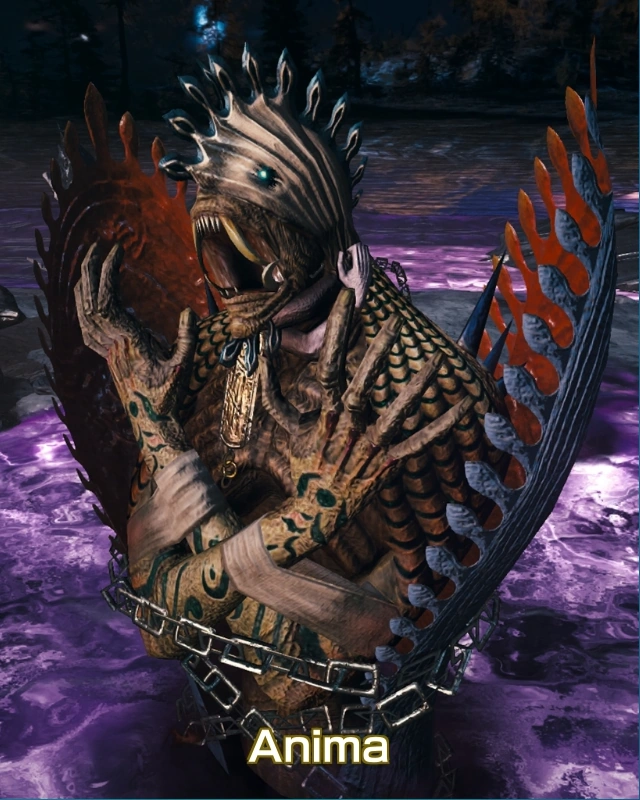
Once the story is complete, the final section opens, offering a higher challenge. These areas are meant to test your ability to direct specific Aeons (Valefor, Ifrit, or Shiva). Each challenge has a reward level after it. Once you have conquered all three challenges, the path is opened to obtain Anima (Aeon).
| Area | Stamina | Battles | Lock requirements | Description | Reward |
|---|---|---|---|---|---|
| Summoner's Fern | 4 | 3 | (complete the storyline) | Lv.8 | |
| Summoner's Bond: Ifrit | 4 | 4 (3) | - | Use the power of summoning to overcome your trial! Summon Ifrit to defeat the bosses, a pair of |
|
| Precious Fruit | 3 | 2 | Summon Ifrit to defeat the pair of Blizzard Dragons! | ||
| Summoner's Bond: Shiva | 4 | 4 | - | Use the power of summoning to overcome your trial! Summon Shiva to defeat the bosses, |
|
| Precious Fruit | 3 | 2 | Summon Shiva to defeat Dahaka and Atomos! | ||
| Summoner's Bond: Valefor | 4 | 4 | - | Use the power of summoning to overcome your trial! Summon Valefor to defeat the bosses, the |
|
| Precious Fruit | 3 | 2 | Summon Valefor to defeat the light and dark Cyclopes! | ||
| Fern's Crown | 3 | 2 | Overcome all the trials! | ||
| Shrouded Temple: First Floor | 4 | 4 | (complete the Fern's Crown} | The This battle does not allow Continues. Beware the Final Attack ability! |
|
| Shrouded Temple: Second Floor | 4 | 4 | - | The This battle does not allow Continues. Beware the Final Attack ability! |
|
| Shrouded Temple: Third Floor | 4 | 4 | - | The This battle does not allow Continues. Beware the Final Attack ability! |
|
| Anima's Altar | 6 | 5 | - | The path to This battle does not allow Continues. Beware the Final Attack ability! |
New Aeon: Anima |
Key Items[]
These items are gathered to unlock spaces on the Sphere Grid and Aeon Sphere Grid.
- Attribute Sphere
- Auto-Ability Sphere (blue)
- Key Sphere
- Aeon Growth Sphere
- Aeon Key Sphere
- Valefor Sphere
- Ifrit Sphere
- Shiva Sphere
- Anima Sphere
These items unlock paths in Macalania.
- Key of the Frozen Wastes
Aeons[]
- Shiva (Aeon) is gained as an ally early in the region.
- Anima (Aeon) is gained as an ally at the end of the region.

Special Fiends[]
- Fire Flan
- Water Flan
- Wind Flan
- Earth Flan
- White Flan
- Black Flan
- Vidatu / Aerouge
- Shantak / Garuda
- Gigaflan
Reference[]
Trivia[]
- Music is from Final Fantasy X Remaster soundtrack:
| Area | FFX track name |
|---|---|
| Opening movie, first areas | Macalania Woods |
| Battle theme | Battle Theme |
| Battle victory | Victory Fanfare |
| Battle with Yojimbo, Summoner's Fern | Assault |
| Battle with Shiva | Enemy Attack |
| Shiva, Anima's Trials | A Contest of Aeons |
| The center Spring | Suteki Da Ne? |
| searching for Yuna | Servants of the Mountain |
| searching for Tidus | Tidus' Theme |
| ending movie | A Fleeting Dream |